Introducing Printer Calibration in Tape Label Studio


Por que a calibração da impressora é importante
Before printer calibration, adjusting layouts or offsets often meant playing a tedious game of trial and error. You’d tweak settings, print a page, check the result — and often repeat the cycle multiple times. Each round wasted time, paper, and toner.
Now, with Calibração da impressora, that process is a thing of the past.
How It Works
You’ll find the Printer Calibration feature right in the menu principal of Tape Label Studio.
-
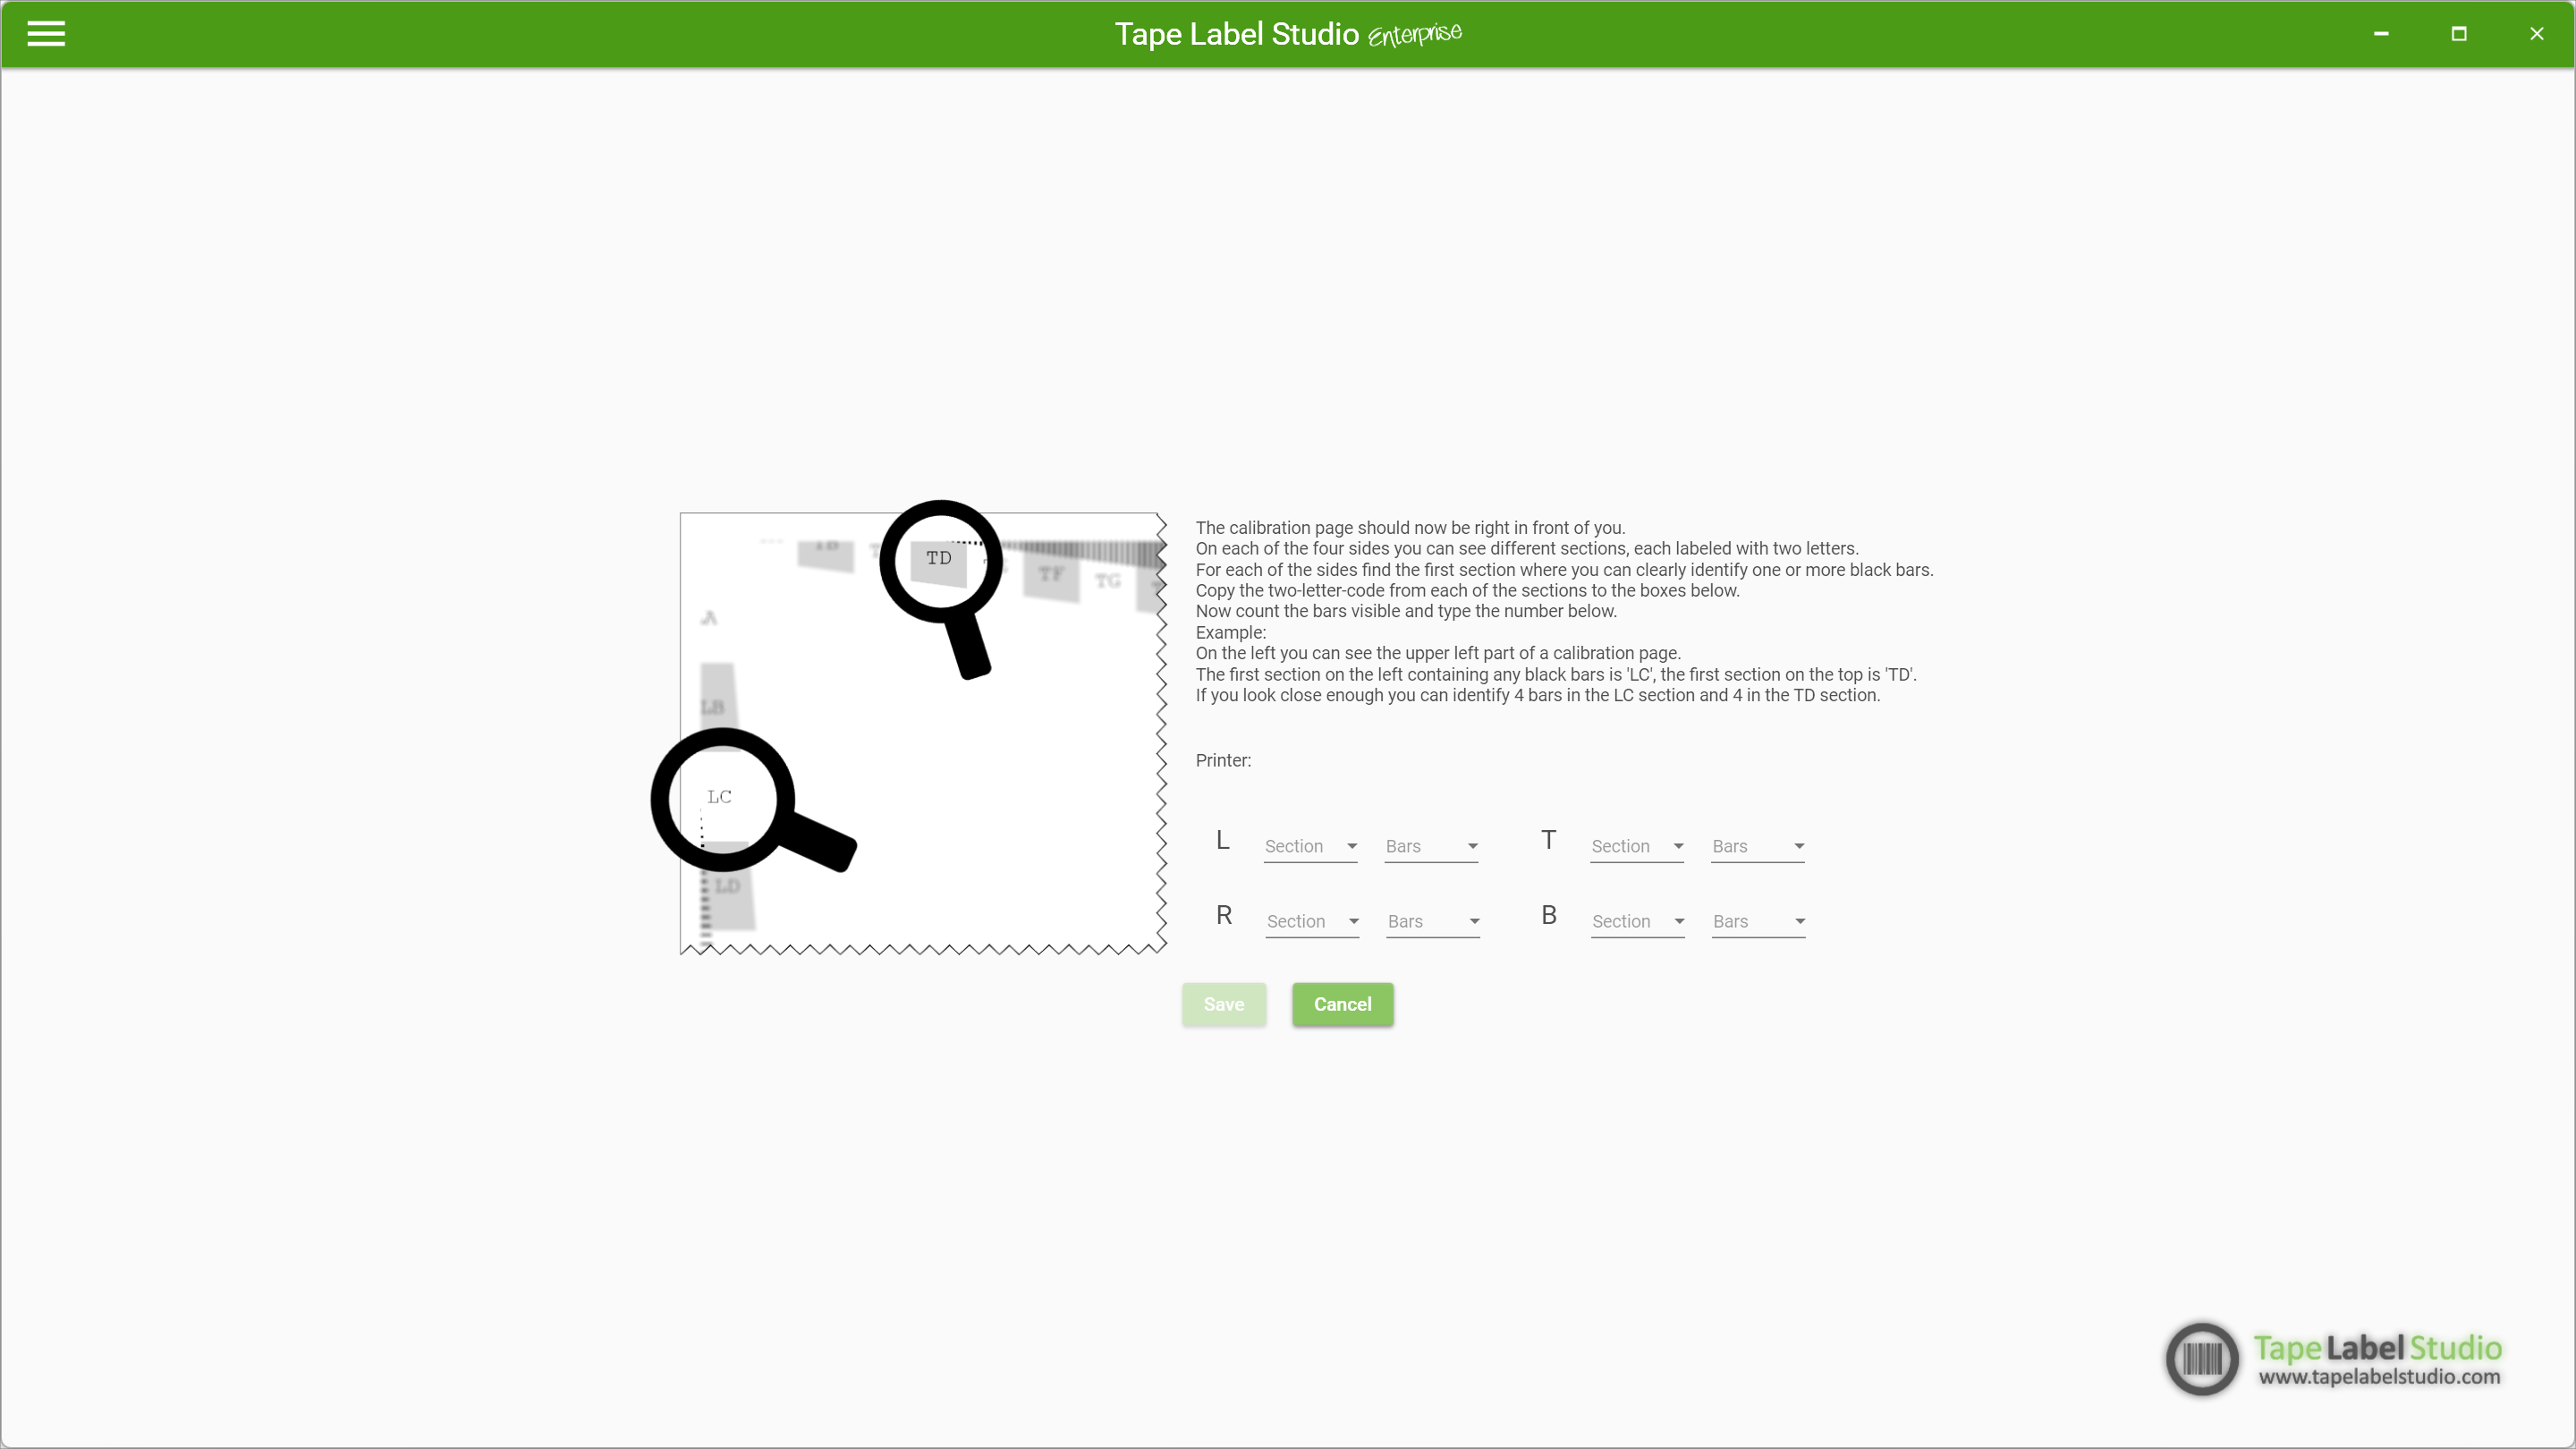
Start the process by printing a calibration page using the exact printer you plan to use for your labels.
-
Use the same settings you would for your real print job — including paper size (e.g., A4 or Letter) and paper tray.
After printing, Tape Label Studio will guide you through entering a few simple measurements from the calibration page. These values tell the software how your printer handles margins and positioning.
Smarter Label Printing
Once calibrated, you can enable or disable printer calibration at any time — in Modo automático, Modo avançado, and the Template Editor.
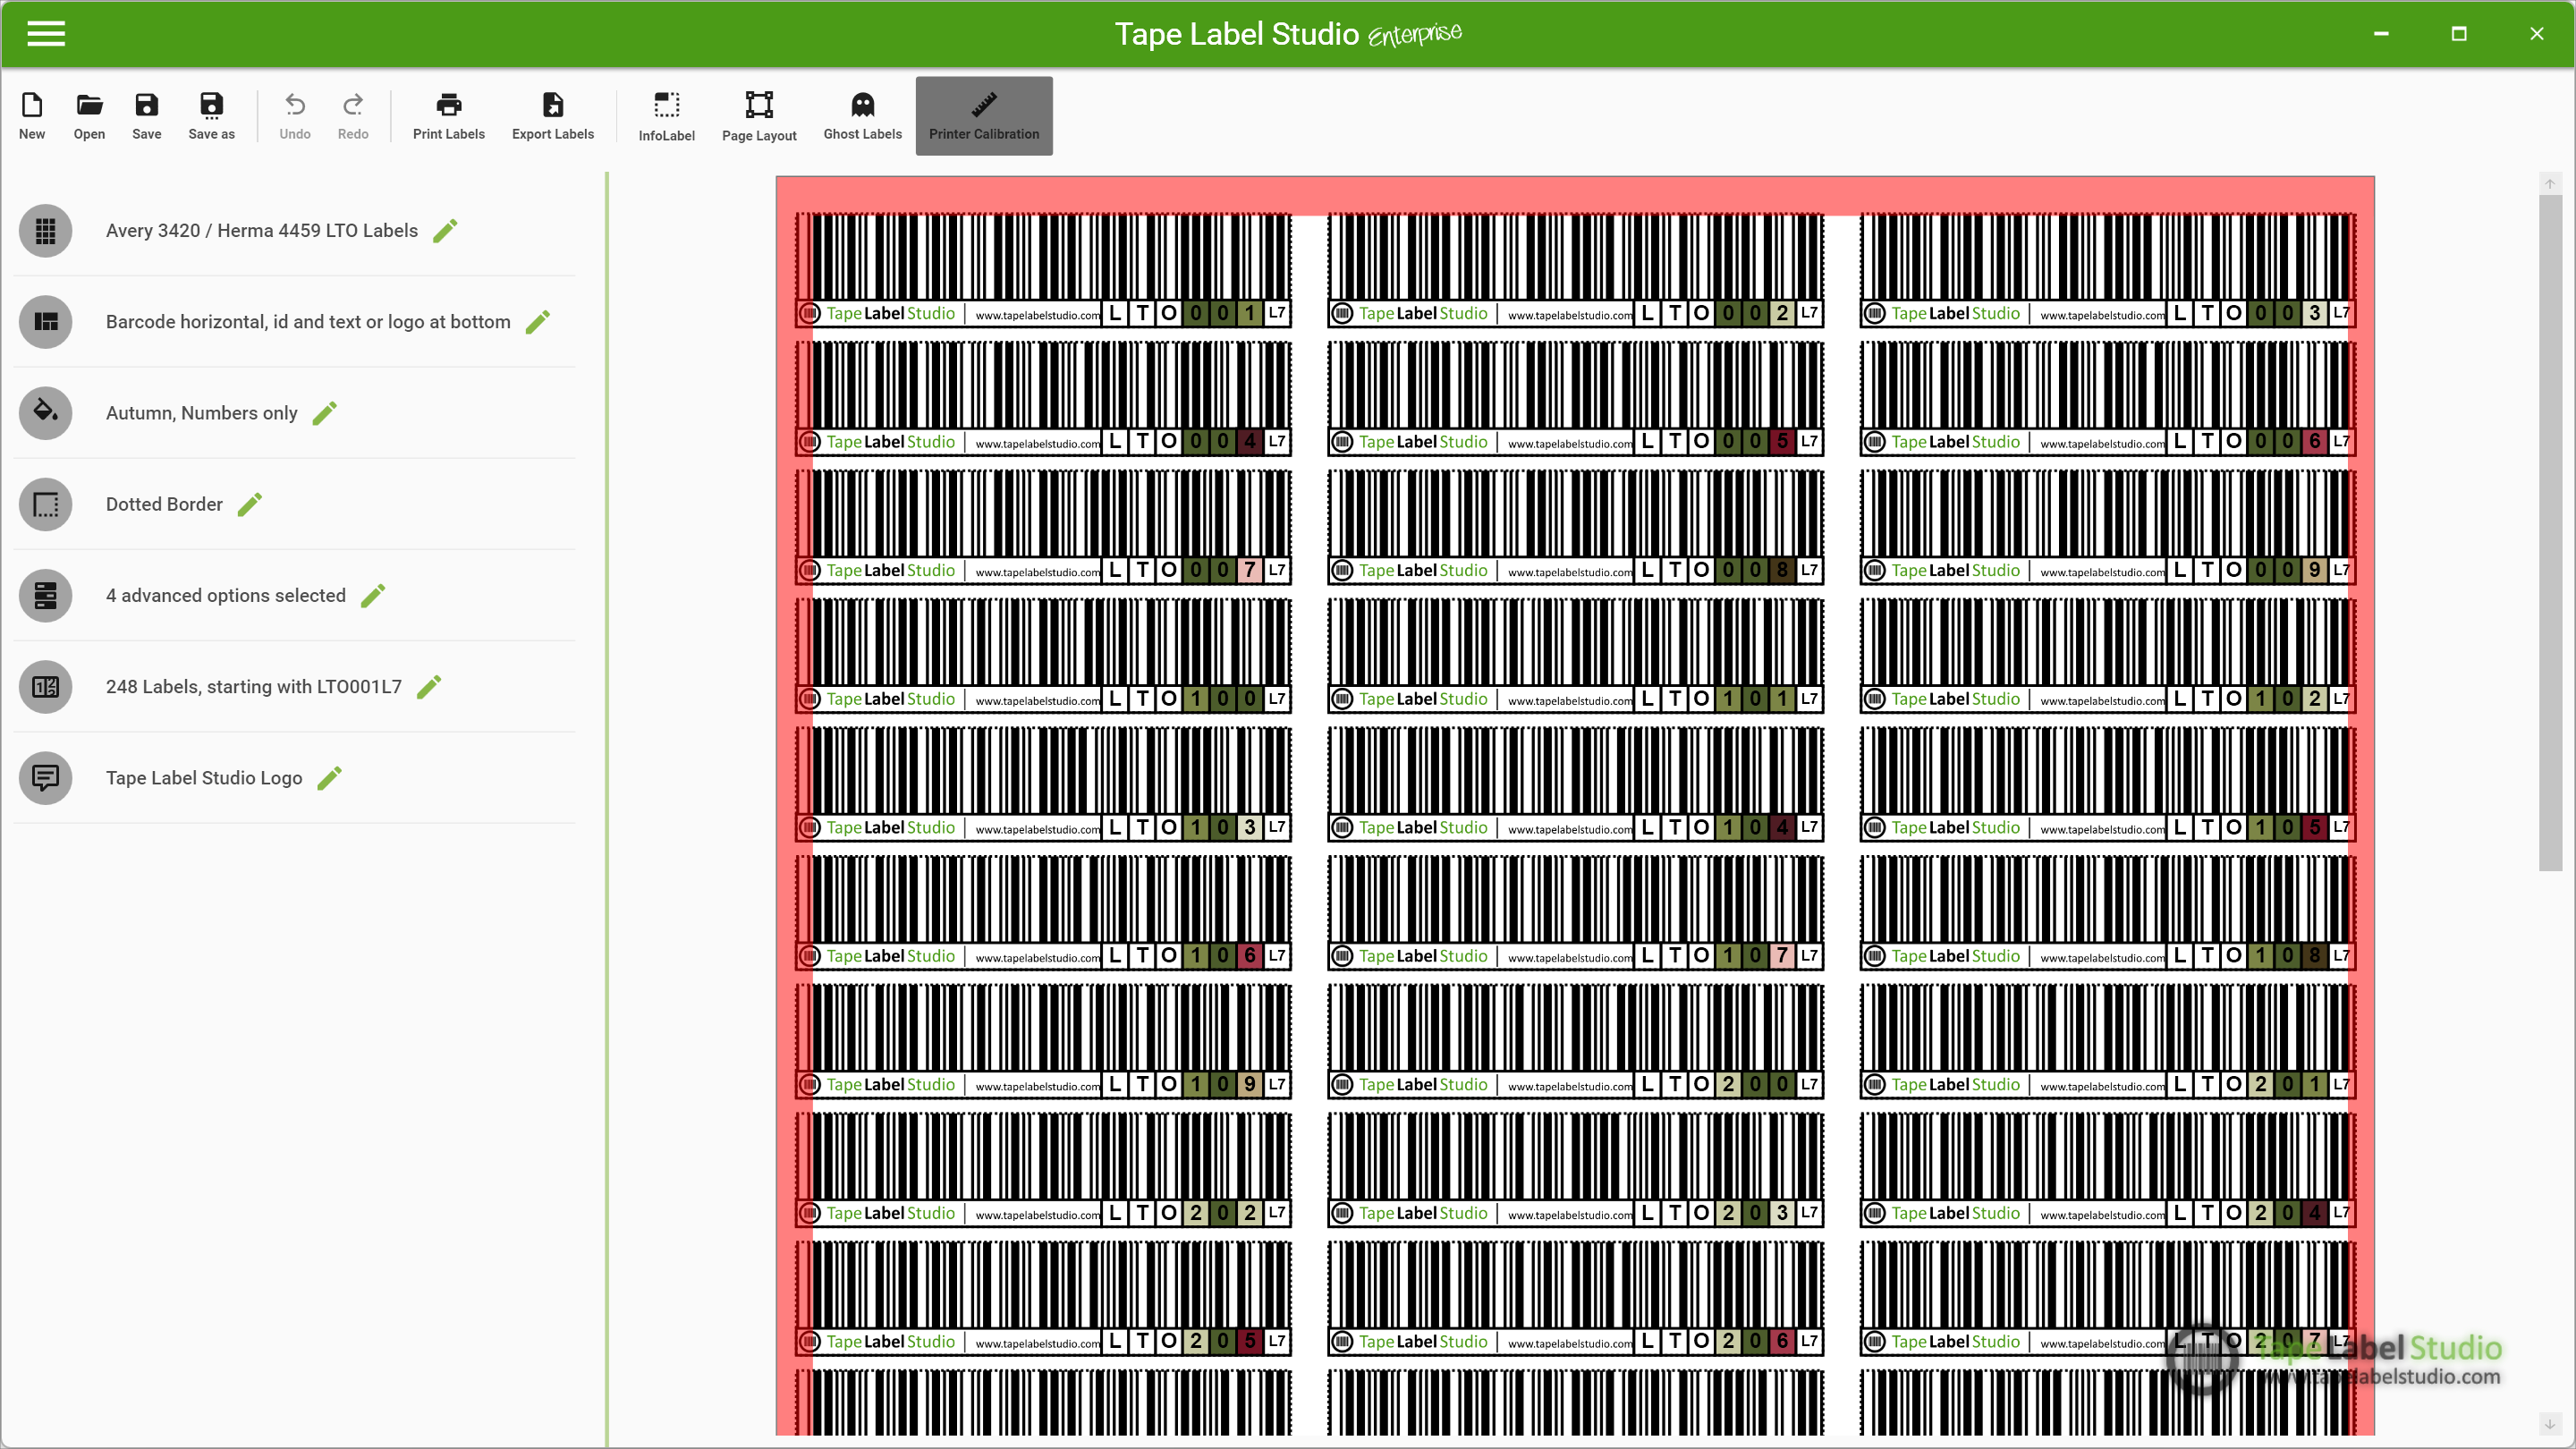
A red frame will appear in the preview window, clearly showing the non-printable areas based on your printer’s characteristics. This helps you fine-tune offsets and layout dimensions with confidence.
The Result? Perfect Labels, Every Time
With Printer Calibration, you no longer need to worry about misaligned prints or labels cut off at the edge. Just calibrate once, and Tape Label Studio will take care of the rest.